PyODPS 支持对 MaxCompute 表的基本操作,包括创建表、创建表的 Schema、同步表更新、获取表数据、删除表、表分区操作以及如何将表转换为 DataFrame 对象。
删除表
使用入口对象的delete_table() 方法删除已经存在的表。
from odps import ODPS

# 只有表存在时,才删除表
o.delete_table('my_new_table', if_exists=True)
创建表
from odps import ODPS

# 创建分区表
table = o.create_table('my_new_table', ('num bigint, num2 double', 'pt string'), if_not_exists=True)

# 验证表是否创建成功
print(o.exist_table('my_new_table'))
获取表
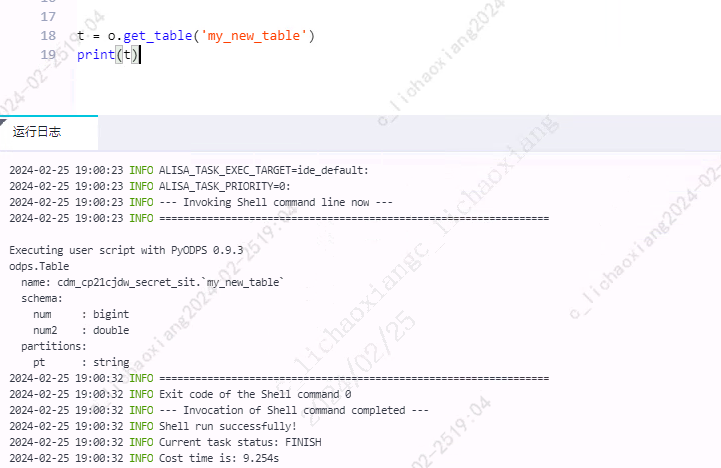
使用入口对象的 o.get_table() 方法获取表。
t = o.get_table('my_new_table')
print(t)
写入表数据
write_table()
使用入口对象的 write_table() 方法写入数据。
- 调用
write_table()方法向表中写入数据时会追加到原有数据中 - 对于非分区表,需要调用
table.truncate()方法 - 对于分区表,需要删除分区后再建立新的分区
from odps import ODPS

t = o.get_table('my_new_table')
t.delete_partition('pt=test', if_exists=True)

# 对于分区表,如果分区不存在,可以使用 create_partition 参数指定创建分区
records = [
    [111, 1.0],
    [222, 2.0],
    [333, 3.0],
    [444, 4.0]
]
# 创建 pt=test 分区并写入数据
o.write_table('my_new_table', records, partition='pt=test', create_partition=True)
write_table() 为入口对象,所以使用 o.write_table();delete_partition() 为表对象,所以使用 t.delete_partition()。
open_writer()
对表对象调用 open_writer() 方法写入数据。
from odps import ODPS

t = o.get_table('my_new_table')

# 创建 pt=test02 分区并写入数据
with t.open_writer(partition='pt=test02', create_partition=True) as writer:
    records = [
        [1, 1.0],
        [2, 2.0],
        [3, 3.0],
        [4, 4.0]
    ]
    writer.write(records)
read_table()
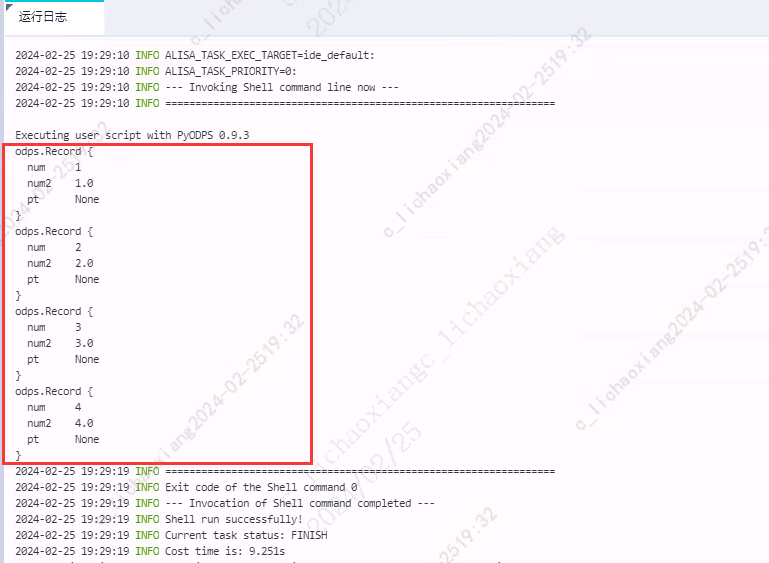
使用入口对象的 read_table() 方法。
for record in o.read_table('my_new_table', partition='pt=test02'):
    print(record)
open_reader()
调用表对象的 open_reader() 方法读取数据
- 使用 with 表达式的写法如下:
t = o.get_table('my_new_table')

with t.open_reader(partition='pt=test02') as reader:
    for record in reader:
        print(record)
- 不使用 with 表达式的写法如下:
t = o.get_table('my_new_table')

reader = t.open_reader(partition='pt=test02')
for record in reader:
    print(record)
转换表为 DataFrame
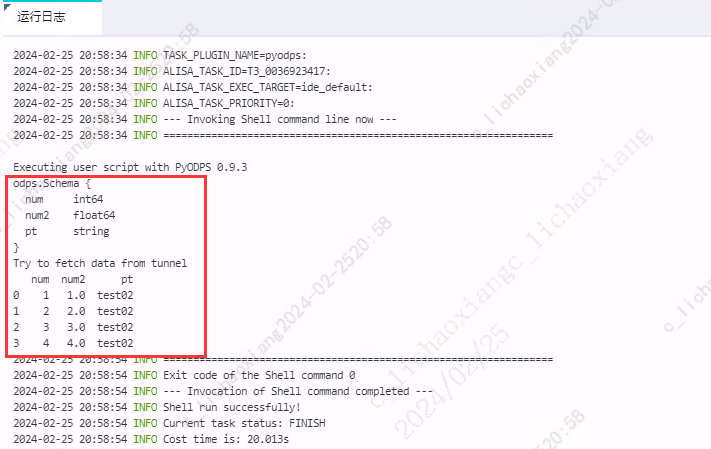
使用 to_df() 方法,即可转化为 DataFrame 对象。
table = o.get_table('my_new_table')

df = table.to_df()
# 通过 dtypes 属性查看这个 DataFrame 的字段及字段类型
print(df)

# 执行并返回全部结果
print(df.execute())
执行 SQL 语句
执行 execute_sql() 和 run_sql() 后的返回值是任务实例。
execute_sql()
同步的方式执行,会阻塞直到 SQL 语句执行完成。
instance = o.execute_sql('select * from my_new_table')
print(instance)
run_sql()
异步的方式执行。
instance = o.run_sql('select * from my_new_table')
print(instance)
读取 SQL 执行结果
open_reader()
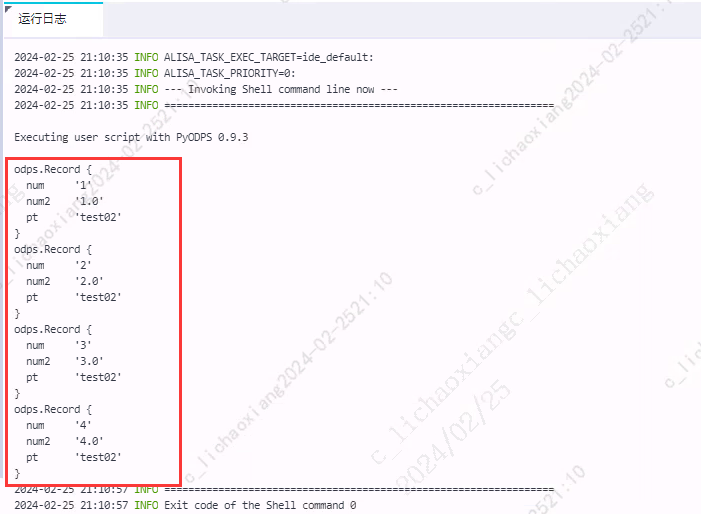
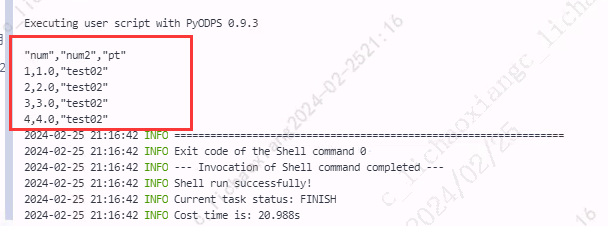
- 读取表数据,返回结构化数据,通过 for 语句遍历即可
with o.execute_sql('select * from my_new_table').open_reader() as reader:
    # 处理每一个 record
    for record in reader:
        print(record)
- 通过
reader.raw也可获取结果集
with o.execute_sql('select * from my_new_table').open_reader() as reader:
    result = reader.raw
print(result)
- 执行
desc等命令,返回非结构化数据,需要通过reader.raw获取执行结果
with o.execute_sql('desc my_new_table').open_reader() as reader:
    print(reader.raw)
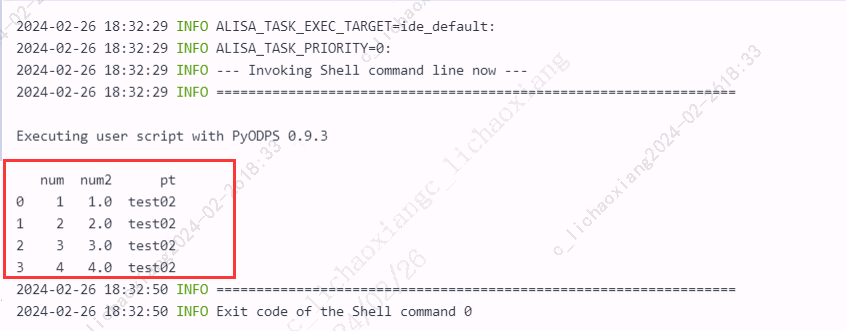
设置读取结果为 Pandas DataFrame
# 直接使用 reader 的 to_pandas 方法
with o.execute_sql('select * from my_new_table').open_reader(tunnel=True) as reader:
    pd_df = reader.to_pandas()
    print(pd_df)
获取数据超过10000行
在调用 open_reader() 时,PyODPS 会默认调用旧的 Result 接口,可能会出现获取数据超时或获取数据受限等问题。可以按照如下方法指定 PyODPS 调用 Instance Tunnel。
- 在脚本中设置 options.tunnel.use_instance_tunnel =True
- 按照如下示例,设置 open_reader(tunnel=True)。从 PyODPS v0.7.7.1 开始,可以通过 open_reader() 方法读取全量数据。
# 打开 Instance Tunnel 并关闭 limit 限制
options.tunnel.use_instance_tunnel = True
options.tunnel.limit_instance_tunnel = False

with o.execute_sql('select * from my_new_table').open_reader(tunnel=True) as reader:
    for record in reader:
        print(record)
参考资料
原创文章,转载请注明出处:http://www.opcoder.cn/article/66/